Vitality 4 Life uses cookies to provide and improve our services, if you continue browsing, we consider that you accept its use. For more information, please see our privacy page.


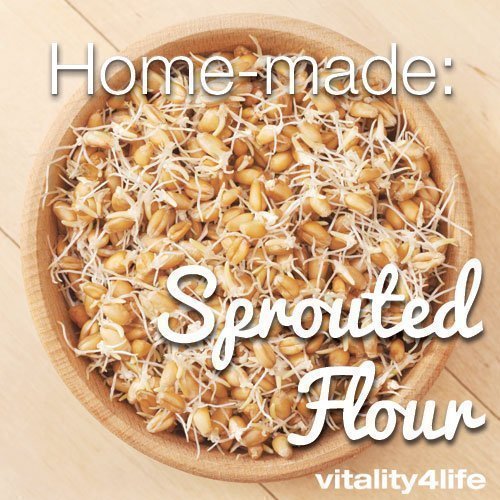
How to Sprout Grains & Make Sprouted Flour
09,March,2015
How to Sprout Whole Grains and Make Sprouted Flour
Making your own sprouted flour is definitely a labor of love, however the end result and the nutritional value makes it absolutely worth it!
The traditional way to prepare grains back in the day was to soak them until they had begun to form little sprouts, this was done for easier digestability and to increase the essential vitamins like vitamins B and C. It was also done to reduce the bad phytic acid which can actually decrease the body’s ability to absorb iron, magnesium, zinc, copper and calcium. All vital nutrients that our bodies need! This method of grain preparation can even help break down the gluten in the wheat berry making it possible for people with a gluten intolerance to enjoy grains again!
Sprouted grain flour has seen a resurgence in popularity of late and is fast becoming popular in many home kitchens and cafes. Many healthy home enthusiasts are returning to these traditional preparation methods. It can be made it in bulk and stored in airtight containers in your cupboard or you can even freeze it to use in sweet treats like sprouted grain cookies, or sprouted bread. There is nothing quite like knowing you have made your own healthy flour!
Sprouting the grains does take a bit of time, but it is easy and can be done in bulk so that you only have to do it every month or so depending on how much sprouted flour you and your family use. You can sprout any grain, provided you’re working from the whole grain berry, not a rolled, flaked or otherwise damaged grain. Wheat, spelt, oats and barley will all work very well for sprouting.
You will need to begin the dehydrating process not long after the root tip appears, if left to sprout for too long you will run the risk of “malting” the grains which is not ideal. This can cause the flour to become overly sweet and it can also cause an undercooked sticky texture when used for bread and cakes.
You should be able to purchase whole grain berries at your local health food store.
It’s a beautiful transformation and a wonderful process for the whole family to be involved in. Kids especially will find the whole process fascinating.
What you’ll need to make Sprouted Flour:
- Wheat Berries
- Glass Jars
- Mesh/Cheesecloth or some new clean stockings cut into squares (big enough to cover the top of your jar and secure with a rubber band)
- Thick Rubber Bands
- Water
- Food Dehydrator
- Grain Mill or Blender
Steps for Making Sprouted Flour
1. Start by filling your jars about 1/3 to 1/2 full with your wheat berries
2. Fill your jars all the way to the top with water
3. Cover with the mesh, cheesecloth or stocking squares and secure with a thick rubber band
4. Allow them to sit for 8 hours or overnight (by the morning the grains will nearly be to the top of the jar!)
5. In the morning drain the water out (leaving the cover in place) and leave upside down in your sink at a slight angle if you can to ensure the air is able to circulate around the grains
TIP: resting then jars on a cake cooling rack will enable you to leave on an angle
6. Every 6-8 hours rinse with more water and leave to drain as in step 5
7. Continue this process until the root tips begin to form, you want the sprouts to be about 1/4 inch long, this can take anywhere between 6 – 48 hours depending on how warm your kitchen is.
NOTE: The root tips forming means that the grains have been prepared properly and that the wheat has finally released that nasty phytic acid!
8. Now it time to dehydrate! Spread the seeds out on your BioChef Dehydrator Trays, you will also need to use Non-Stick Sheets or a Fine Mesh Sheet so that the dried grains do not fall through the holes.
9. Dehydrate for 12 – 18 hours on 95 - 140ºF. You don’t want to go over 150ºF as you will destroy all of the enzymes you released during sprouting
10. The grains are done when you bite into one and they are no longer chewy or soft. They should be hard and have no moisture left.
11. If you have a Flour Mill you will simply need to put them through your machine and you will have the freshest, most nourishing flour you have ever tasted. If you do not have a Flour Mill you can still make flour by putting the dehydrated grains into your BioChef Blender and pulverizing until a fine powder has formed, you can then sieve out any of the bigger pieces and VIOLA! Fresh sprouted flour!
It’s that easy! And so good for you! You now have a flour that is not only dense in vitamins and minerals but will taste amazing.
Now that you’re sprouted flour is ready why not give one of these yummy recipes a try…
Sprouted Flour Sugar Cookies
Ingredients:
- ¾ cup of softened butter
- 2 organic eggs
- 1 cup of maple sugar or muscavado sugar
- 1 teaspoon natural vanilla extract or vanilla bean paste
- 2 ½ cups of sprouted wheat or spelt flour
- 1 tsp baking powder
- ½ tsp salt
- Water
Directions:
1. In a large bowl cream butter and sugar until smooth and pale.
2. Beat in eggs one at a time and then add vanilla
3. Stir in flour, baking powder and salt (NOTE: If dough feels or looks too dry add water a teaspoon at a time until you get a dough that holds together well that is neither wet or sticky.)
4. Chill dough for at least 1 hour. Overnight is preferable but sometimes you just need cookies immediately!
5. Preheat your oven to 180 - 200ºc
6. On a floured surface roll out your chilled dough until it is ¼ to ½ inch thick and cut into whatever shapes you like. Place cookies 1 inch apart on a tray lined with baking paper.
7. With a pastry brush dab on a very mall amount of water or milk and sprinkle with a tiny bit of castor sugar
8. Bake for 6-10 minutes. After 6 minutes you will need to watch your cookies as all ovens are different so baking times may vary.
Enjoy with a cup of tea.
Savoury Sprouted Flour Muffins
Ingredients:
- 1 cup of cubed pumpkin
- ½ cup cubed fetta cheese
- ½ cup semi or sun dried tomatoes chopped
- 1 cup grated zucchini
- 1 large handful chopped spinach
- 2 tsp wholegrain mustard
- ¾ cup finely grated parmesan cheese
- ¾ cup milk
- 2 organic eggs
- 2 cups sprouted wheat flour
- 4 tsp baking powder
- Sunflower seeds
- Pinch of mixed herbs
- Salt and Pepper to taste
Directions:
1. Cook cubed pumpkin for a few minutes until softened but not cooked all the way through
2. Place the pumpkin, fetta cheese, semi dry tomatoes, zucchini, spinach, mustard, parmesan cheese and herbs into a large bowl and toss together
3. Lightly beat the eggs and milk together with the salt and pepper and pour over veggie mix
4. Sift the sprouted flour and the baking powder and fold all ingredients together until well combined.
5. Top with sunflower seeds and bake in your oven at 180-200ºc for 20-25 minutes until golden, or until a skewer comes out clean.
Best served warm but equally as delicious cold. Perfect for school or work lunches or as a healthy afternoon snack!